


免费、开源、全平台同步笔记软件——Joplin 服务器搭建
1. 介绍
Joplin是一个免费、开源的笔记和待办事项的软件,支持搜索,笔记格式是Markdown。
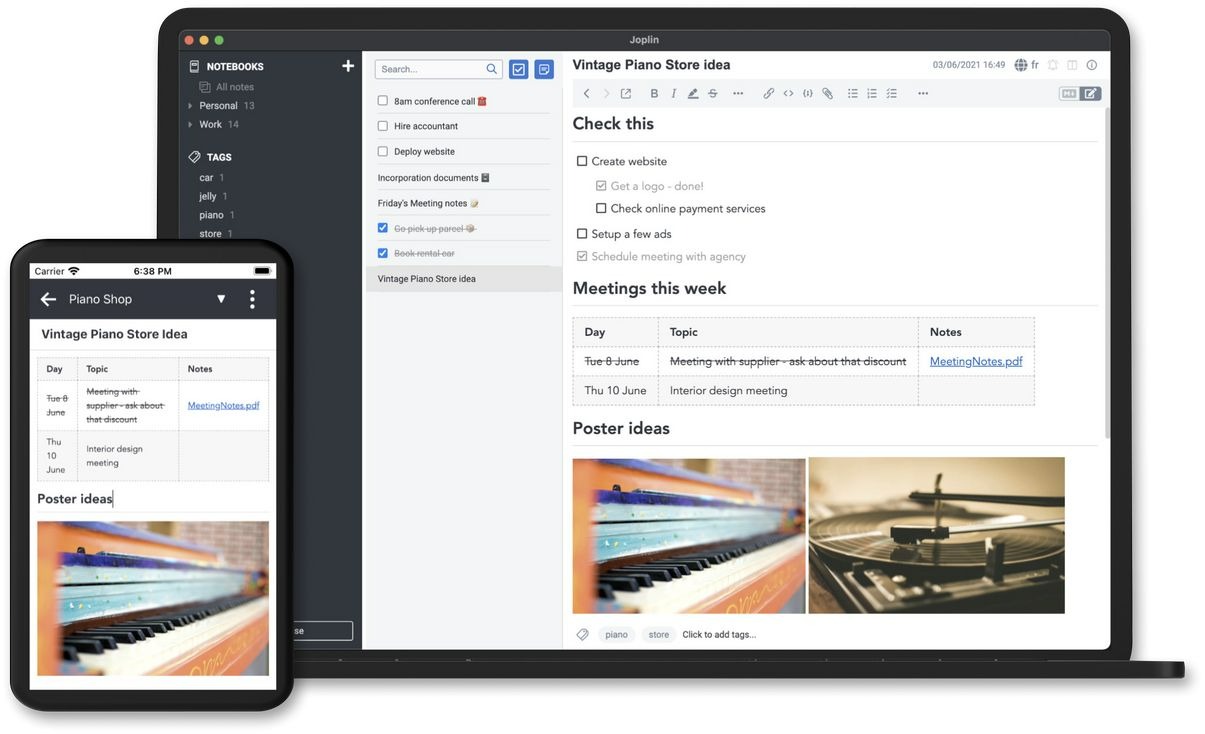
笔记可以使用端对端加密与各种云服务安全地同步,包括Nextcloud、Dropbox、OneDrive和Joplin Cloud(今天我们就来分享如何搭建Joplin Cloud)。 全文搜索在所有平台上都可用,以快速找到你需要的信息。 该应用程序可用于Windows、Linux、macOS、Android和iOS。 支持网页剪裁,可以从你的浏览器中保存网页和截图,也可用于火狐和Chrome。 软件开箱即用,我们今天主要来分享一下,如何搭建Joplin Cloud同步服务器。 这个服务器允许你与任何Joplin客户端进行同步,就像你与Dropbox、OneDrive等进行同步一样。
1.1 为什么需要自建Joplin Cloud
一句话总结,效率更高,更稳定。

为什么会这么快?我想部分原因是WebDAV协议的效率太低了。它为每个请求发送不必要的大的XML块,下载和解析都很耗时。它也不支持delta同步(与Joplin服务器不同),这意味着在同步前需要下载完整的文件列表,以便比较本地和远程项目。
最后,Nextcloud的文件锁定系统有可能意味着每次请求的开销。这应该不多,因为它是由Redis处理的,但谁知道呢。Joplin服务器不需要加锁,因为数据的一致性是由客户处理的。
因此,只要遵循常识,只以合理的格式(JSON)传输所需的数据,我们就能获得更多的性能。
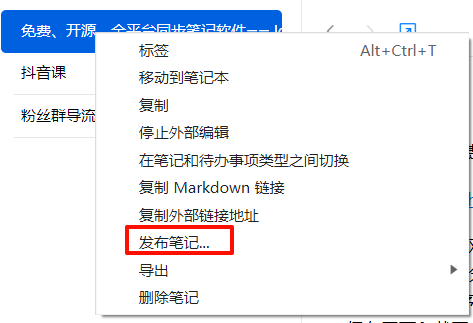
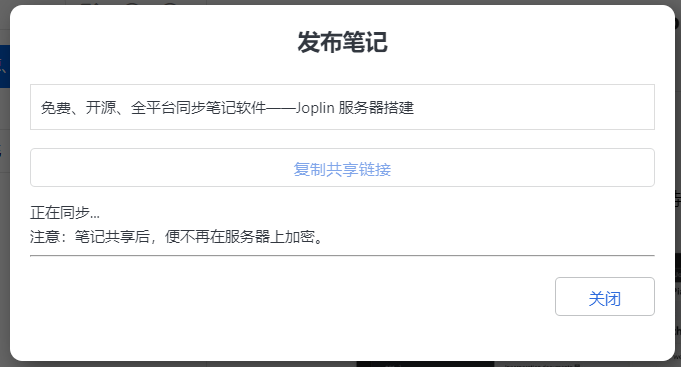
1.2 自建Joplin Cloud分享链接展示
2. 项目展示
GitHub原项目地址(感谢作者的付出):https://github.com/laurent22/joplin(30.6k star)
Docker镜像地址:https://hub.docker.com/r/joplin/server
官网地址:joplinapp.org
3. 搭建方式
创建一下安装的目录:
mkdir -p /root/data/docker_data/joplin
cd /root/data/docker_data/joplin
nano docker-compose.yml
docker-compose.yml填入以下内容:
# This is a sample docker-compose file that can be used to run Joplin Server
# along with a PostgreSQL server.
#
# Update the following fields in the stanza below:
#
# POSTGRES_USER
# POSTGRES_PASSWORD
# APP_BASE_URL
#
# APP_BASE_URL: This is the base public URL where the service will be running.
#   - If Joplin Server needs to be accessible over the internet, configure APP_BASE_URL as follows: https://example.com/joplin.
#   - If Joplin Server does not need to be accessible over the internet, set the the APP_BASE_URL to your server's hostname.
#     For Example: http://[hostname]:22300. The base URL can include the port.
# APP_PORT: The local port on which the Docker container will listen.
#   - This would typically be mapped to port to 443 (TLS) with a reverse proxy.
#   - If Joplin Server does not need to be accessible over the internet, the port can be mapped to 22300.

version: '3'

services:
    db:
        image: postgres:13
        volumes:
            - ./data/postgres:/var/lib/postgresql/data
        ports:
            - "5432:5432"  # 左边的端口可以更换,右边不要动!
        restart: unless-stopped
        environment:
            - POSTGRES_PASSWORD=changeme # 改成你自己的密码
            - POSTGRES_USER=username  # 改成你自己的用户名
            - POSTGRES_DB=joplin
    app:
        image: joplin/server:latest
        depends_on:
            - db
        ports:
            - "22300:22300" # 左边的端口可以更换,右边不要动!
        restart: unless-stopped
        environment:
            - APP_PORT=22300
            - APP_BASE_URL=https://your.domain.com # 改成反代的域名
            - DB_CLIENT=pg
            - POSTGRES_PASSWORD=changeme # 与上面的密码对应!
            - POSTGRES_DATABASE=joplin
            - POSTGRES_USER=username  # 与上面的用户名对应!
            - POSTGRES_PORT=5432 # 与上面右边的对应!
            - POSTGRES_HOST=db
没问题的话,ctrl+x退出,按y保存,enter确认。
4. 反向代理
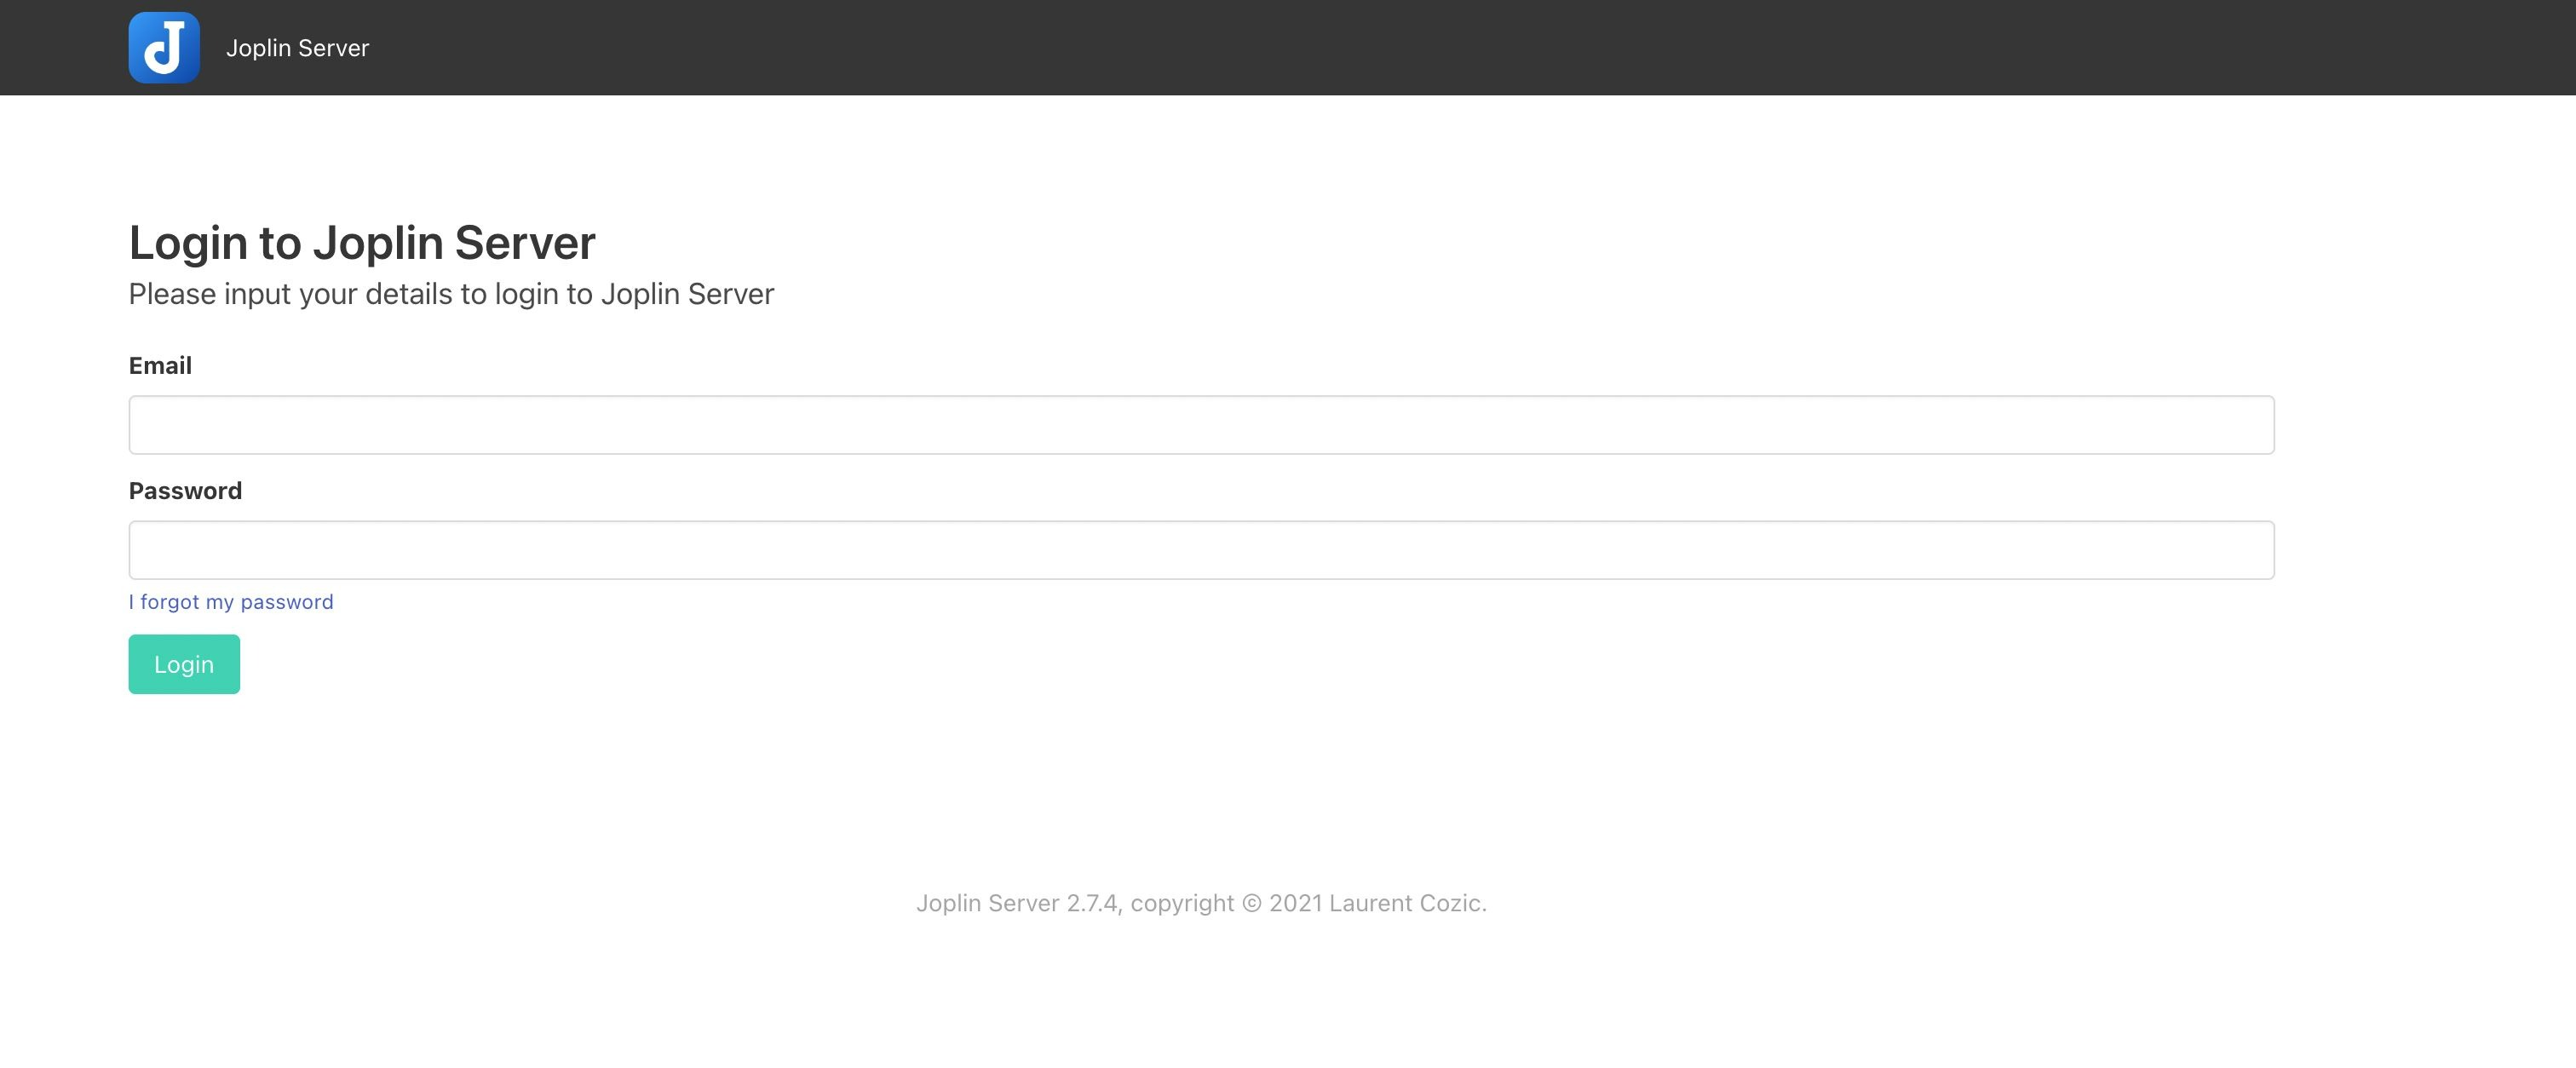
在添加反向代理之前,确保你已经完成了域名解析,之后,登陆Nginx Proxy Manager,添加反向代理。然后就可以用域名来安装访问了。
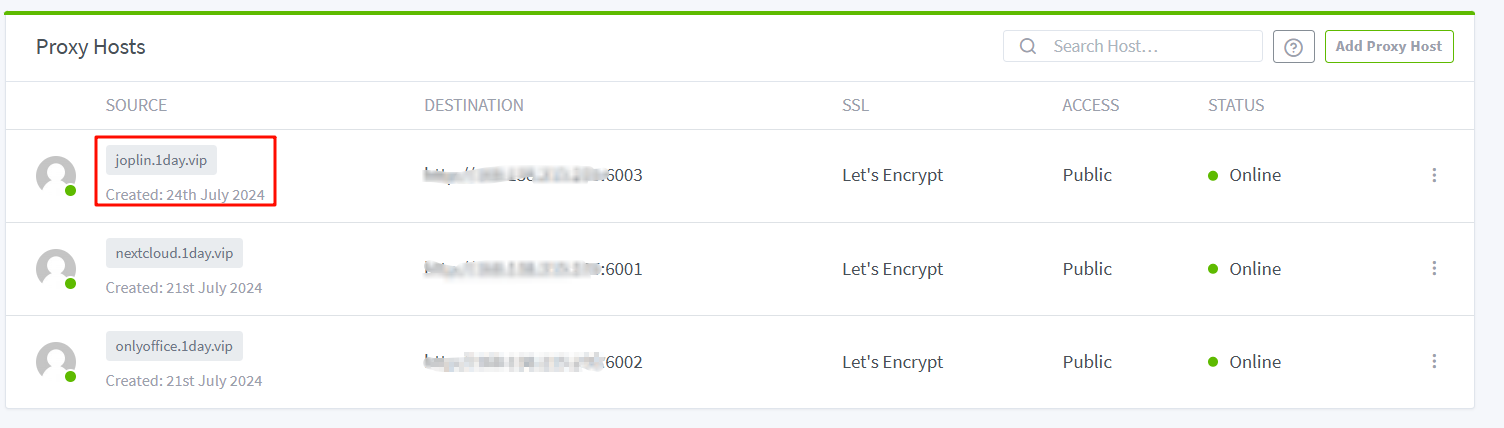
默认账号:admin@localhost

默认密码:admin
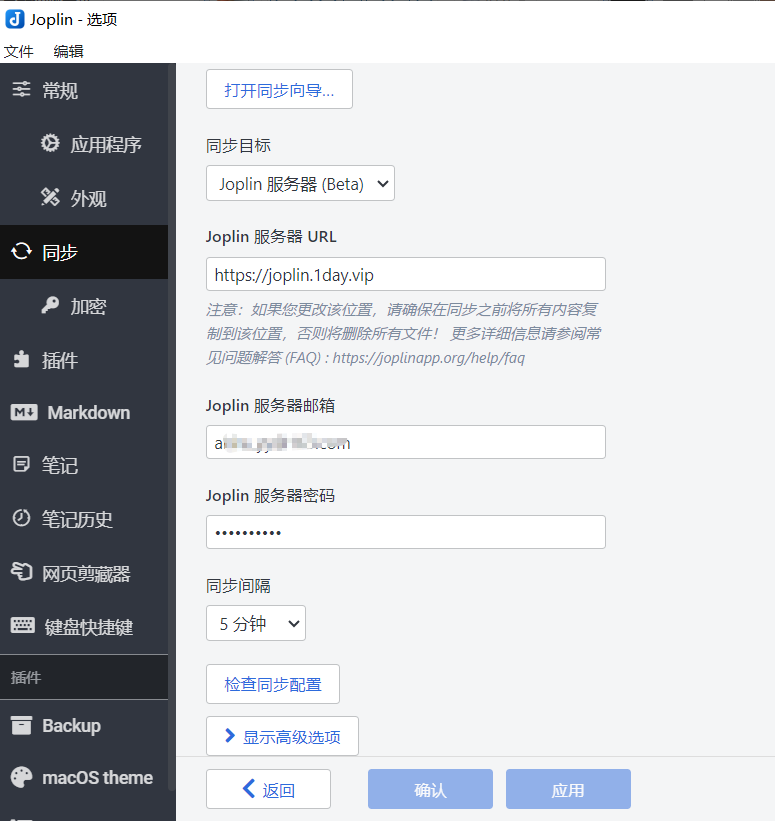
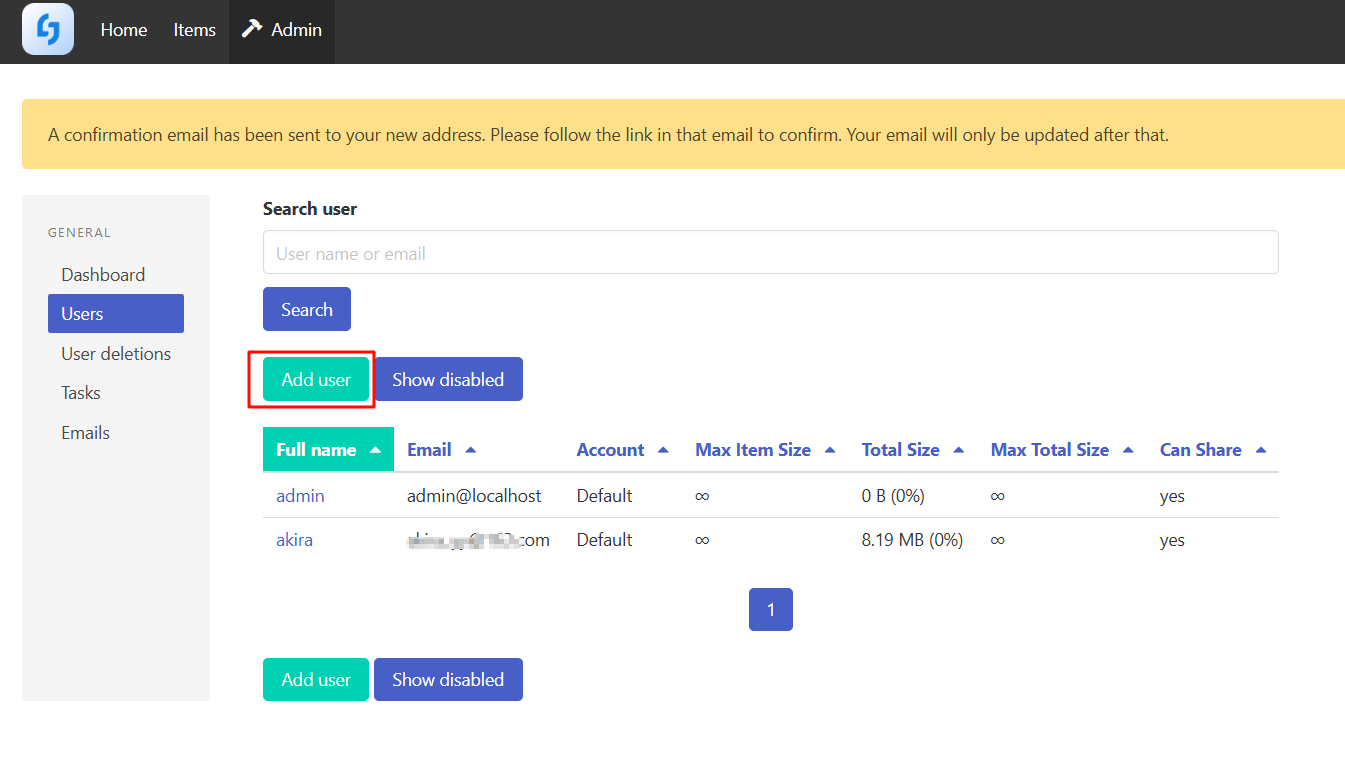
5. 使用教程
5.1 添加新用户
5.2 设置客户端